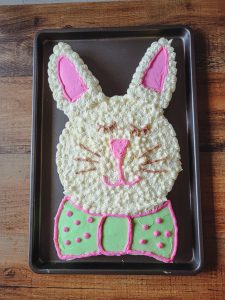
A Traditional Bunny Cake, Fun and Easy to Make!
Spring is such a fun time. Lots of gardening, hatching chicks on the farm, and baking for special spring get-togethers. After a long winter, it’s fun to find fresh, fun desserts to make for your family and friends. A cake that immediately comes to mind when I think of Spring and Easter is the traditional bunny cake!
This easy-to-make bunny cake was created and popular in the 1970s and continues to be a cake that many still make today. The original cake was decorated using shredded coconut. There are now many different variations of this cake. My Grandma and Mom both have their own special ways of making a bunny cake, and here is how I like to make mine!
Bake Your Cake
To get started bake your favorite cake in two 9″ round pans. You can use a homemade cake recipe or a box mix, whichever you have on hand works great! After you have baked the round cakes, allow them to cool completely.
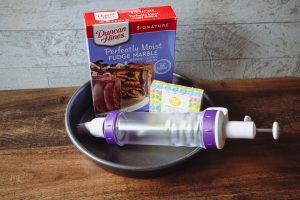
While your cake is cooling, gather your decorations and frosting. For our bunny cake, we really like to use a simple buttercream frosting, and some piping bags. My go-to buttercream frosting recipe is all butter, and so delicious! Any good decorators’ buttercream recipe will work for your bunny cake.
Nestor Buttercream Recipe
To make the buttercream frosting we used you will need 2 sticks of unsalted butter (softened), 4 cups of good quality sifted powdered sugar, 3-4 tablespoons water, 1 teaspoon vanilla extract, and a pinch of salt. You can make this frosting very easily with a mixer but recently we have found using a food processor, you can make buttercream frosting quickly! Now, this method isn’t for every recipe or food processor, but if you have a larger-sized food processor with a mixing attachment you can make some great buttercream, very quickly!
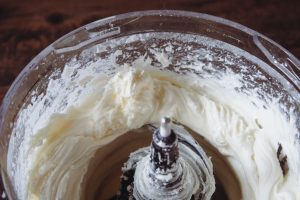
Be sure your butter is softened, and add all the ingredients to your food processor bowl. Pulse until the frosting is completely mixed, and looks light and fluffy!
Let’s Make a Bunny!
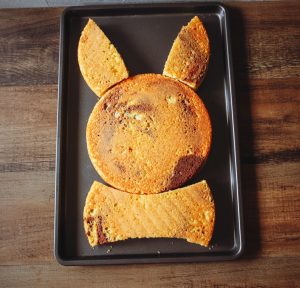
To form your bunny, take one of the circles and place it towards the bottom of a rectangle cake board or a cookie sheet. A cookie sheet is easy to use, and you usually have one on hand. It is also great if you have to transfer the cake anywhere! To keep the cake pieces from moving, use a little dot of the buttercream to “glue” the cake piece into place.
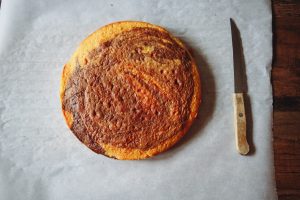
Now your bunny needs some ears and a bow! Using the second cake, cut the sides off like our photo. The sides will be the bunny ears, and the leftover middle will be the bunny bow! You can carefully cut one side, and use it to measure the other side so they are the same. Be sure you have a good sharp knife for the cutting.
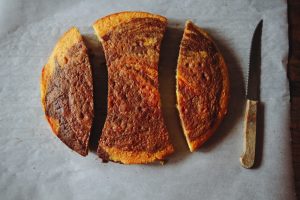
Place the “ears” at the top of the cake circle on the cookie sheet. To help the ears sit nicely, cut about 2″ off each ear placing the flat side against the cake circle. Keep those scraps for a treat for yourself! Add the bow cake piece underneath the cake circle.
Time to Decorate!
Now is the fun part, time to decorate! Recently I found this great dessert decorating tool that helps with making star shapes on a cake. If you have ever covered a cake with stars with a decorating bag, you find quickly it can wear your hand out, this tool was so very helpful!
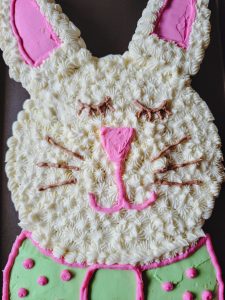
We started by coloring about 1/4 cup of frosting and creating the pink center of the ears on the bunny. You can spread a little pink with a spatula, then add the pink frosting to a decorating bag with a tip 3 circle tip. Just a little note, gel food coloring works great for this project.
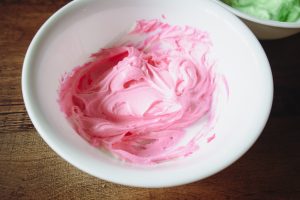
You can also use a spatula and frost the bow using another 1/4 cup of frosting dyed your favorite color, we used green. At this point, I would also suggest setting aside a few tablespoons of frosting for the eyes and whiskers of the cake. You can color the frosting black for the eyes and whiskers. To create our brown color, we added a little cocoa powder to the frosting.
Next frost the entire bunny using the white/cream frosting. You can use the star technique we did, using a star tip. A star 21 tip works great! You can also use a spatula to frost your bunny cake. The stars create a really fun texture to the cake.
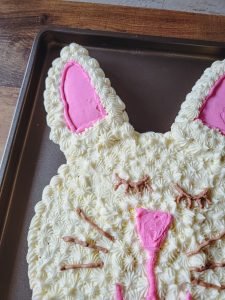
Using what is left of your frosting add a nose to your cake, decorate the bow as you would like, and give your bunny some eyes, and whiskers! A piping bag with round 3 tips is helpful for the designs but you can even use a zippy bag with the corner cut off to make the designs as well!
Enjoy!
After you are all done, it’s time to enjoy your bunny cake! Such a fun and easy cake to make. Your friends and family will be impressed. We hope we have given you the inspiration to make your own bunny cake! Happy Spring!
